Coffee is supposed to keep one awake, but a broken coffee pot can be cause to lose sleep over. But one may perk themselves out of their rut if they know how to repair a coffee maker.
The first thing to remember before starting how to repair a coffee maker is to make certain that the coffee pot has cooled down and the appliance is unplugged. The power source and the power cord should also be checked. If the cord has been damaged, it must be replaced.
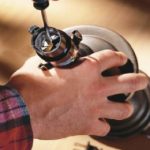
To begin repairs, one should know how to dismantle the coffee maker. The screws at the pot’s base should first be removed so that it can be pried away. If there should be any components inside that need to be removed, one would need a screwdriver for loosening the brackets to do so.
If coffee maker’s problem is that the hot water isn’t flowing through the drip tube, it may be because the tube had just clogged. If this is the case, then it merely needs to be cleaned.
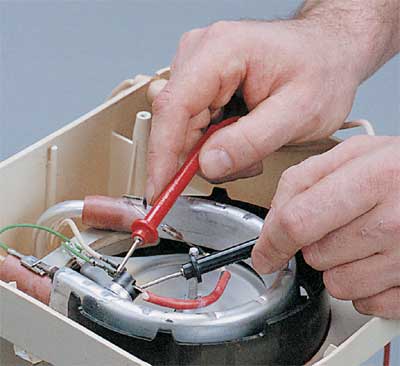
In order to test the thermostat, which is responsible for regulating the temperature, the coffee maker must first be disassembled as previously instructed. A device called a multimeter or VOM (volt-ohm-milliemmeter) is then used, setting it on RX1 and touching its probes to the ends of the thermostat. If the meter reads zero, the thermostat should be fine.
If the coffee maker is pumping water from the holding tank adjacent to the pot going to its top, the problem could be a congested or broken pump valve. After disassembling the pot, check if the valve has been sealed, in which case it cannot be cleaned and one will have to purchase a new one. If the valve can be cleaned, see if this will solve the problem.
If the coffee maker overheats, a circuit will be opened automatically by the thermal cut-off and shut it down instantly. The cut-off is tested by placing the probes of the VOM (set on RX1) on each of its sides. If the reading comes out zero, then the cut-off is just fine. Otherwise, it needs to be replaced.
To test the coffee maker’s heating element, which is responsible for heating the water, the pot is dismantled as instructed. Again set at RX1, the VOM’s probes are placed onto the element terminal. If the reading is 100-300 ohms, the heating element is all right. If not, then it must be replaced.
If the coffee won’t stay warm, the warming element may not be functioning properly. After the pot is dismantled, the warming element is tested in the same way as the heating element. Again, this element should be replaced if it doesn’t read 100-300 ohms. The problem may also come from the warm element switch. To test in, use the VOM on the switch’s leads, testing 2 leads at a time. If the meter reads zero, the switch is in the clear.
If the coffee pot is leaking, see where the leak is coming from first. If the leak is in the bottom, dismantle the pot to inspect the tube connectors; replace them if they have been worn out. If other areas are leaking, the pot may just require cleaning.
Malfunction in coffee makers usually arise due to a build-up of mineral deposits that come from brewed coffee. This can be easily remedied by cleaning the coffee pot regularly. But in the case of electrical glitches, one would really have to learn how to repair a coffee maker to deal with the problem in a more in-depth manner.