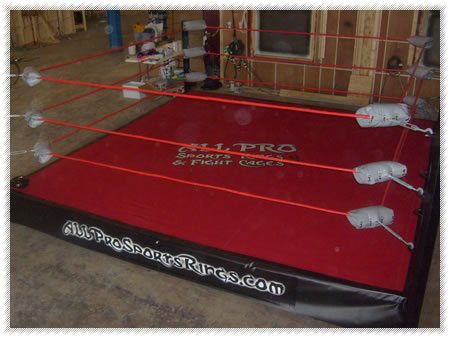
Before you build a wrestling ring, determine the size of the Build a Wrestling Ringpeople that will use it. The physical size of the individuals determines the materials you’ll need to buy and make.
Required Tools and Materials
Steel support (for the ring)
Canvas
Padding
Ropes
Steel posts
Spring coil or flexibeam
Wood planks
Nuts and bolts
Saw
Hammer
Step 1: Make the Ring Frame
Make the ring skeleton from the wood and steel materials. Make it about 3 ft high. Whether you’re using metal, wood or both, just stick to the basic shape. After you make the frame, add the ring posts. Position them on the four corners.
Step 2: Add the Wood Planks and Spring Coil
The next step to build a wrestling ring is to cut the wood planks. The average ring measures 14 to 18 sq ft. Cut the wood planks to the desired length and width. Set them over the steel / wood supports. Secure them in place.
Now put the spring coil in position. Check the spring coil package instructions on how to install them. Professional wrestling rings use flexibeam, so you can try them instead.
Step 3: Put on the Padding and the Canvas
Put the padding on top of the wood planks. The average padding is an inch thick but you can always make it thicker than that. Put the canvas over it. The thickness of the material also depends on the number of people who are going to use it.
Step 4: Installing the Ropes
The next step to build a wrestling ring is to secure the ropes on the posts. Fasten them tight but they need to be flexible enough so wrestlers can bounce off them.
Tie each of the three ropes so that a turnbuckle can be formed. Cover each turnbuckle with some padding (usually 6 inches in diameter). The ropes can be any kind; however they need to be at least an inch in diameter.
Step 5: Testing
Get on the ring and bounce up and down. Does it feel comfortable? Get another person in the ring with you. Try to be thrown off the ropes. Now is the time to test the thickness of the canvas and padding. Try a few wrestling moves to see if the canvas and padding are of the right thickness.
Tips and Warnings
After you build a wrestling ring, don’t neglect the part about your attire. Don some knee and elbow pads. The sport may be “fake”, but you could get hurt if you do the moves incorrectly. Be careful when practicing the maneuvers. Do not allow small children to try wrestling moves.
Clean the ring after being used; sweat and blood will make the surface slippery and could cause injury. Make sure you regularly inspect the spring coils and supports. Over time the supporting structure might break down. Check them out so accidents can be avoided. Replace any worn out parts.
You need patience to build a wrestling ring, but it can be done. When it is finished, let the show begin.


