If you think repairing stem faucets is a task best left to a plumber, well, it’s not. The following instructions will walk you through the process.
Required Tools and Materials
Gaskets
Washers
Rags (clean ones)
A set of screwdrivers
Valve seats
Crescent wrench
Masking tape
Step 1
Turn off the water from the water supply valve. Depending on the design, this may be found below the sink. If not, look at the back of the shower assembly; it will be in a closet. If there isn’t one, go to the central water shutoff of your home.
Step 2
Take off the faucet handle. If it’s hidden under a cap, remove it with a screwdriver. Take off the cap and undo the screw. You can begin repairing stem faucets after removing the handle.
Step 3
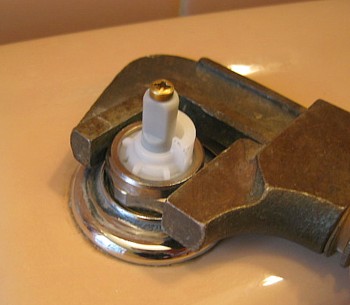
Unfasten the locknut with your wrench. Take out the stem. In other cases, the stem may be connected to the faucet assembly body. In this case you’ll have to unfasten it in a counterclockwise fashion.
Step 4
Examine the stem’s bottom and look for the rubber washer. If the washer is held by a screw, remove it with the screwdriver. Put in the new washer.
Step 5
When the new washer is installed, put the pieces together by reversing the process just described. Turn on the water supply. The dripping should stop.
Tips on Repairing Stem Faucets
If the leak persists, the problems may be the valve itself. Go to the home improvement store and ask what type of wrench should be used. When you have the wrench, remove the stem and you’ll see the valve there.
Because some of the screws are very small, you should set down rags or clothing on the floor. Put the screws and other faucet parts there. This ensures no parts are lost.
Inspect the structure carefully. Does the washer need replacing or is it the stem itself? A corroded stem will have to be replaced. You should take the damaged component to the store so you can get the proper replacements.
Warnings
When repairing stem faucets, it’s a good idea to have a wrench set with you. A crescent wrench is suitable in most cases. But if the nut is embedded too deeply, you’ll need to try other wrenches.
Some faucet seats cannot be replaced. If that’s the case, you’ll need to use a faucet seat grinder to fix it. If you don’t want to do this, you’ll need to replace the whole faucet. Don’t pry the screws or any components too hard with the wrench. If you do, the components may break down.
Only use washers and stems that match your faucet. Forcing an incompatible one in may destroy the whole faucet. If you need a new washer, you might as well get replacement parts for the others. This way you don’t have to make repeat trips to the store.
Repairing stem faucets is really a simple task. Provided you get the proper replacement parts, fixing that leak should be a straightforward process.