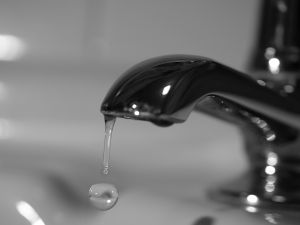
If the dripping sounds are starting to get your nerves,  maybe it’s time you learn how to repair a dripping tap. The step by step instructions below will outline the process.
Required Tools and Materials
Wrench (crescent)
Pliers
Toothbrush
Gasket replacement
Step 1
Begin by turning off the water supply for the sink. This knob will either be below the sink or the pipe linking the toilet and the sink. Set the crescent wrench on the faucet’s head. That’s the last part where the water comes out of. Use the wrench to unfasten and remove the part.
Step 2
Look for the gasket. It looks like a flat donut. It should be in the component you removed. If it isn’t there, look at the part it was connected to. Take off the gasket.
Step 3
The best way to repair a dripping tap is by examining the area for dirt first. Look at the section where you removed the pieces. Use the toothbrush or another cleaning tool to remove grime. Clean the faucet head too.
Step 4
Install your new gasket on the faucet head. Be certain that it is flat. Screw the head onto the faucet. Take care so that the gasket doesn’t get stuck on the grooves. Fasten it with the crescent until it is completely snug.
Step 5
Turn on the water supply. Open the faucet and let water run for half a minute. Shut it. There should be no more dripping.
Fixing Bathtub Faucet Leaks
The instructions below will help you repair a dripping tap in the bathtub. Almost always the cause is a dilapidated rubber washer.
Required Tools and Materials
Pliers
Screwdrivers
New rubber washer
Step 1
Turn off the water valve. Turn on the faucet in the bathtub.
Step 2
Take off the middle cap that is on the knobs (these are the “cold” and “hot”). You’ll need to utilize the pliers. The center knob will come off. There should be a screw in the center. Remove the screw. Take out the handle.
Step 3
Separate the two faucet components. The rubber washer will be on one of the two. To repair a dripping tap, take off the washer. Use the screwdriver if necessary.
Step 4
Put in the new rubber washer. Follow these steps in reverse to put the faucet back together. Turn on the water valves. Check the faucet; there should be no more leaks.
Tips and Warnings
Clean the workspace so you don’t lose any of the screws or bolts. If you need to buy gaskets or rubber washers, take the old one to the shop. This will ensure you get the right replacement part. Wear gloves when you clean the faucet off dirt and grime. Get a set of screwdrivers and wrenches. This ensures you’ll be able to unfasten the faucet parts.
Knowing how to do some basic home repair can translate into savings. By knowing how to repair a dripping tap, you’ll save on both the costs of hiring a repairman and your water bill.


