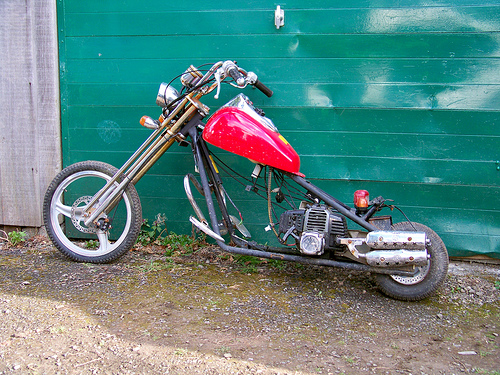
When you try to learn how to build a mini bike, you must remember that there are two important factors: The things you need, and the things you need to do. In other words, the parts and the process can spell out the difference between having success in this exciting do-it-yourself project.
While it is really so easy to merely purchase a ready-made bike, understanding the things you need to bear in mind in learning how to build a mini bike may prove to be really more fulfilling than just buying something already made for you.
The Right Supplies
For the parts, you need to purchase around thirteen important bike pieces.
This includes the following (not in particular order):
One: A shaft engine that’s horizontal in shape with around a Tecumseh 3.5 horsepower.
Two: Good pairs of tires. You don’t need big ones, though. Just make sure that they are of good quality.
Three: When you purchase tires, don’t forget the rims. Typically, they come with the tires. If you noticed that they weren’t included, just go back and purchase the rims.
Four: Purchase a transmission. Make sure it would perfectly fit the engine crankshaft.
Five: The seat of the bike should also be ready for making your project. You can either make one for this purpose or merely buy one.
Six: Buy some bolts. You need those to be able to mount the other parts.
Seven: An engine kill switch would also be very handy.
Eight: The frame of your bike should be bought, too.
Nine: Some things should come together when you buy them. Parts like the ones that must be used for the rear wheel assembly. This includes the spacers, axle, brake, sprocket, chain and the connecting link.
Ten: The engine mount is also important. If you have a frame already with you, chances are there is a mount on it already. But if there is none, you may need to purchase this or make one from strong wood.
Eleven: You should also have a chain breaker.
Twelve: If you have the parts of the rear wheel assembly, you should also have those for the front. The parts of the front wheel assembly such as the spacers, rim and tire should also be included.
Thirteen: Other essential parts are the brake cable, brake lever, throttle and the throttle cable.
The Steps to Follow
Once everything is in, you start with cleaning the frame and painting it. The next step would be to put the axles – making sure that you only bolt one portion. The front wheel assembly comes next. This would come in the order of the frame, spacer, tire, spacer, frame – placed from the right to the left.
After those first few steps, you’re now ready to work on the back wheel assembly. The process for this is just like the one for the front wheel assembly. It only becomes a bit difficult because of the placement of the sprocket and brake.
If you have an engine mount on the frame you bought, you need not do this next step. For this, you place the transmission on the engine. Then you place this on the engine mount. Holding the chain among your supplies, you put that in the transmission. Check and move the engine so you can see if the chain is placed well on the mount. Go and weld the mount.
For those who have the mount on the frame, you can easily put the engine on the engine mount. Bolt it tightly. Then, working on the wheel and transmission, carefully put the chain.
You now may proceed to cut the chain using the chain breaker. To know exactly where you should do that, bear in mind that it should be at a certain point where the chain wouldn’t be either too loose or too tight.
After that, put the throttle, the cables and brake handles.
Work now on the connections between the throttle cable and the engine, and the brake lever with the brake system.
Once you’re done with that, you can then place the kill switch on the frame. Make sure it’s near the throttle. And that’s it!
To see how this is all done, you may get a manual or view a how-to video for more information and help in learning how to build a mini bike.