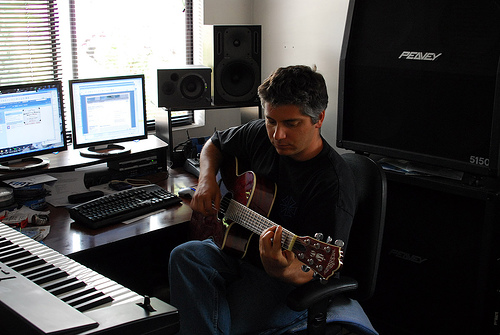
Improvements in technology have made it possible for people to make their own music at home. Here are the things you will need to build a home recording studio.
Required Tools and Materials
Acoustic treatment
Headphones
Microphones
Monitor speakers
Audio Interface
Recording software
Computer
Curtains and other absorptive materials
Choose between a Mac or PC. Macs come with their own digital audio workstation (DAW). There are also many similar apps for Windows based machines. There are many types of software available.
Check the features of each one before you buy. Whichever OS you pick, get a computer with as much RAM and disk space as possible. These audio applications are resource hungry.
Step 2
Decide if you will go for multi-track or single track recording. If you prefer single track, look for USB devices like a microphone that doubles as an audio interface.
If you like the multi-track configuration, there are also some applications available. Before you build a home recording studio, check your computer for its Firewire or USB connections.
Step 3
Choose the microphone. Two main types are available: condenser and dynamic. Majority of studio microphones are condenser. However, it is a good idea to have both types at your studio.
Step 4
The next step is to hook up the computer to the studio monitors. Search the audio interface for the proper connections. Two variants are available: passive and active.
The passive needs an external power amp while the active comes with power amps. Use studio monitors than home stereo speakers. The former have linear frequency response which can enhance the sound.
Step 5
For recordings, utilize the headphones. Note that bleed from studio monitors can disturb the recording. This may also generate feedback. It is best to use closed back headphones when you record. There are hi-fi/home stereo headphones, you are better off with professional headphones. You can find these online.
Step 6
Room acoustics are also important. Use diffusive and absorptive materials to treat reflections. The absorptive materials will prevent sound waves from reflecting.
The diffusive materials will spread the sound. Good absorptive materials are tapestries, rugs and carpets. A good diffuser is a bookcase. It is best to use these absorptive and diffusive materials at the same time.
After you build a home recording studio, you can start recording. Open your software and plug the line instrument or microphone in. Now you can start recording. Computer audio programs are set up differently, so read the help guide first.