A good paint job can make a whole lot of difference in a room. Just as particular colors can enhance a room’s mood, painting stripes on walls seem to enhance the visual structure of the room. For instance, painting on vertical stripes can provide texture to the walls, as well as making the ceiling appear higher, which in effect makes the room look bigger than it actually is.
In painting stripes on walls, one will need 2 colors of paint. One of these will be used to give the wall a clean coat and serve to contrast with the stripe that will be painted on later. The wall’s coating should have the same hue as the paint for the stripes in order for them to blend much better.
Too much contrasting colors would only give the wall a rather garish appearance, but similar hues may lend a rich look to the stripes. If one opts to go with a tone-for-tone style for the stripes, employ the same color of paint, but apply a semi-gloss finish on the base and render the stripe with a flat finish.
Before painting the stripes on, let the newly-coated wall dry first for a period of 48 hours at the least. If not, the new coat will just be pulled off by the tape. If one is working under humid conditions, it is best to have a dehumidifier put into the room to allow the paint to dry faster. With a measuring tape, the wall should be measured corner-to-corner, the resulting measurement divided by the intended width of the stripe. To give an example, should the wall measure a width of 120” (10’) and one decides the stripes should have a width of 10”, 120 would then be divided by 10 for a total of 12 stripes. As such, one would only have to paint 6 stripes, the rest of the stripes being made up by the previous coat of paint on the wall.
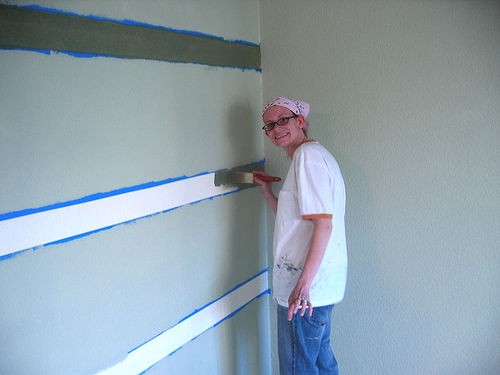
Half of the first stripe’s width is marked out, beginning at the corner in the back of the door. To use the sample measurements, it would be 5”. A mark is then made at the top, middle, and bottom of the wall, running a piece of low-tack painter’s tape to mark each measurement. Employ a level to ensure that it is aligned properly. Starting from the first taped mark, every 10” down the length of the wall’s top portion is marked, doing likewise for the wall’s middle and bottom. While this process may take a while, it will only serve to make sure that the stripes will be nice and straight when painted on the wall.
Each mark is then ran with a line of painter’s tape; ensure that the edges are rubbed down so as to be level with the wall. Otherwise, the paint might leak into the tape and mess up the edges. It is important to keep each line of the tape even in order to be certain that the one has not swerved from the center. Aside from the top edge, the bottom should also be taped off. Start painting on the stripes using a roller. To keep the stripes straight, simply paint over the tape’s edge. When using either glossy or semi-gloss paint, the tape should first be removed before the paint dries. If one is using flat paint, the tape can be pulled off after it has dried. Remember to twist the tape a bit further from the freshly-painted surface when pulling it off.