Ceramic tile can be used to create beautiful, elegant and classy floors. However, this particular kind of material is prone to damage especially when the floor is not maintained properly. Some of the common problems include cracking, discoloration and other types of damages. It is easier to solve these problems by learning how to fix damaged floor ceramic tiles.
Materials Needed
For you to complete this moderate task, you need to bring in a reliable adhesive, work gloves and grout sealer. Aside from these, you must also have a putty knife or notched trowel, tile grout and large sponge. In addition, bring in screws or nails, a chisel and an awl. Lastly, do not forget to bring safety glasses and a hammer.
Steps
Go to the nearest home improvement or flooring supply center and then choose the right kind of tiles to match the rest of the tiles on your floor. To make things easier, you can bring one of the damaged tiles and then show it to the store attendant for assistance. While at the store, be sure to buy premixed grout and adhesive to make your job easier later on.
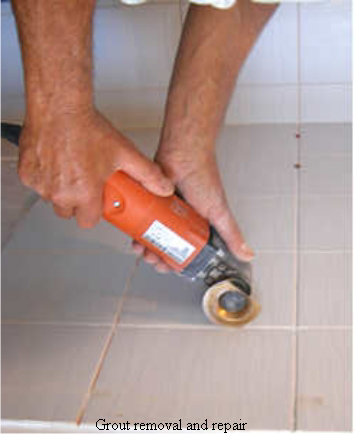
Get the chisel or awl and then use it to remove old grout that is holding the damage tile. Be careful when doing this in order not to cause damage to the tiles in the surrounding areas. Use it to chip out and remove the old damaged tile as well. Do it slowly, preferably one piece at a time. For this, you have to pound the chisel slowly with a hammer until the damaged tile is completely removed.
It is important to scrape off the old grout and adhesive. Be patient in doing this as it may take quite a while to finish. If the subsurface is smooth and clean, the better the newly installed tile will remain in place. Before putting the new tile, the floor beneath it must be firm, solid and structurally sound. In case it is loose, you can make it firm by driving nails or screws right through it.
Get the putty knife or notched trowel and then use it to apply the adhesive at the back of the new tile. Push it tightly in place. Wait for it to dry before moving on to the other tiles. Put grout in the surrounding areas of every tile.
Smooth out the joints by removing excess grout with the help of a wet sponge. Leave the grout untouched for about 15 minutes. Do this to every damaged tile. Wait for them to dry up for about 24 hours. Apply a clear waterproof sealer on the grout to prevent rot, mildew and staining from developing.